
Temenos Lifecycle Management Suite - Collection Product Guide
Screens
| End-User Guide > Screens |
This topic contains general information about screens in the Lifecycle Management Suite. Lifecycle Management Suite screen types include person, account, and case screens. Screens allow users to create, edit, and view account, case, and account holder data. They are accessed from the Screens tab in the left navigation panel of the workspace.
 |
Ticket screens are not available in the screens tab. |

The list of screens displayed varies based on the account or case in context, the user's security permissions, and the areas assigned to the screen. When configuring screens, the system administrator defines the account and case types for which the screen is available.
Person screens display information related to the person in context such as Contacts, Promises, and Workflow History. Person screens are identified in the Screens tab with a person icon  .
.
|
For more information on person screens, please see the Person System Screens topic in this guide. |
Account screens display information related to the account in context such as Letter History, Payment History, and Documents. Account screens are identified in the Screens tab with a financial institution icon  . For more information on account screens, please see the Account System Screens topic in this guide.
Case screens display information related to the case in context such as Case Tasks, or Bankruptcy or Repossession information. Case screens are identified in the Screens tab with a briefcase icon  . For more information on case screens, please see the Case System Screens topic in this guide. Case screens are used in the Collections module.
When any account or case screen is open in the workspace, the account selector drop-down within the screen tab can be used to change the screen to display information for the selected account or case.
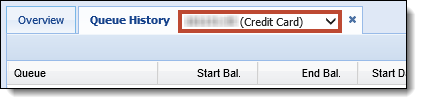
Select an account from the drop-down to view information for a specific account.

Once the desired account/case is selected, the screen refreshes.
|
The account selector drop-down defaults to All for the Promise History screen. When an account/case is selected within the Related Accounts or Related Cases panel, the account selector drop-down defaults to the account/case in context. |
Screens are made up of panels, defined by the system administrator when creating the screen. Each panel may have its own unique behavior. For example, if an account or case panel is on a person screen, the panel is only displayed if it is mapped to the account or case in context in the workspace.
Additionally, a Messages panel can be configured to appear on a person screen to display important messages about the person in context.
|
For more information on the Messages panel, please see the Messages Panel on Person Screens topic in this guide. |
Address, Phone and Email panels provide an overview of a person's demographic information in the workspace, as well as allow users to easily add an address, phone, or email record for a person.

The following options are available within the top of the panel to enable the ability to filter the number of records displayed when the panel renders in the workspace:
| Panel Filter | Description | ||||
|
All Addresses All Phones All Email Addresses |
Select this radio button to display all of the records for the person in context, including the duplicates. This button is labeled "All Addresses," "All Phones," or "All Emails" depending on the panel. | ||||
| Hide Duplicates |
By default, the Hide Duplicates button is selected within each panel to hide duplicate address, phone, or email address records in the panel grid.
|
||||
| Include Closed Accounts |
Select this check box to include records related to any closed accounts for the PersonMasterID in the panel. By default, this check box is set to false to exclude records for closed accounts from appearing in the panel grid. |
|
When rendering accounts in the above panels, the system first looks at the value of the ‘Include Closed Accounts’ check box, and then reviews the All/Hide Duplicates radio buttons.
|
To view details relating to a record, such as collateral, double-click the record on the panel in the workspace. Once selected, an edit screen displays.

Add or edit any information and click Save and Close to return to the workspace. The updated information appears on the screen.
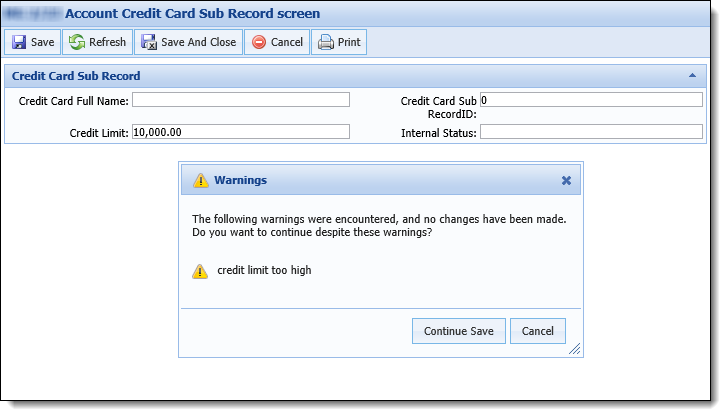
Validation Rules can be configured by a system administrator to display a message after adding or editing information on a screen and clicking  . Validation rules can present warning or error messages to the user, alerting them to issues or restrictions related to the information entered on the screen. The message informs the user of the warning or error and provides instructions on how to proceed.
In the example below, a warning validation rule was configured by a system administrator to warn the user when they enter a Credit Limit value that is above $5,000.00. The warning message allows the user to click Continue Save to proceed with saving the screen or click Cancel to return to the screen to make the necessary adjustments to the information.
For more information about screens, check out our screens video tutorial available on the Collaboration Portal.
